 Wheatgrass; step by step directions on how to grow your own organic wheatgrass and wheatgrass growing, harvest, storing, saving and juicing guide.
WheatGrass Health Benefits
Harvesting and Storing Wheatgrass
Juicing and Drinking Wheatgrass
Cleaning Your Wheatgrass Juicer
STEP ONE – How to Grow Wheatgrass
Soaking and Sprouting Wheatgrass Seeds
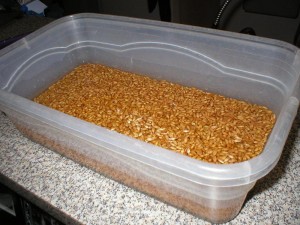
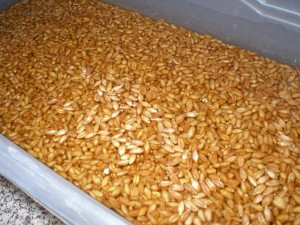
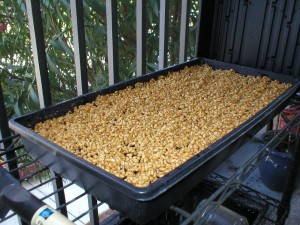
Soak about two cups of ORGANIC wheatgrass beery seeds in water (filtered water preferred) for about 18 to 24 hours. For your convenience use a soaking tray or sprouting cup which is preferably either glass or a BPA free plastic container (plastic soaking tray shown).
After about 24 hours remove the soaking wheatgrass berry seeds from your sprout container or soaking tray and lightly rinse and let drip free of water (for convenience a strainer can be used). Most seeds should show tiny white sprouts so be gentle.
STEP TWO – Organic Soil for Wheatgrass Growing
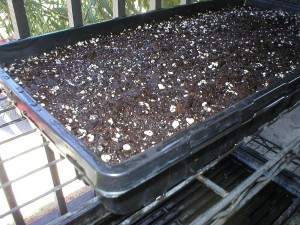
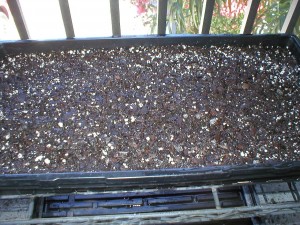
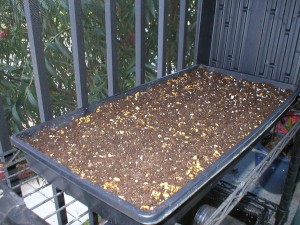
Prepare your organic soil in drip through growing tray by putting about one and one half inches of organic soil in growing tray (tray size shown aprx.= 20″ L x 10″ W x 2.5″ Deep).
Water your organic growing soil til it drips out the bottom of the growing tray (shown with water catch underneath growing tray).
STEP THREE – Azomite Mineral Soil Additive
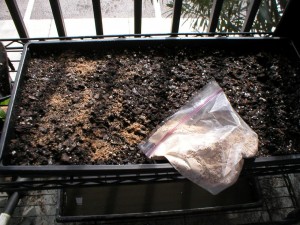
Add a light sprinkling of azomite mineral additive to your organic soil.
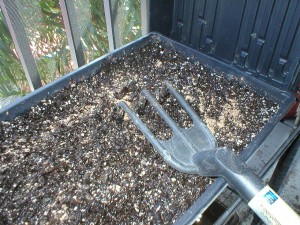
Mix the azomite into soil and water lightly to push the mineral additive into the soil.
STEP FOUR – Planting Your Wheatgrass Seeds
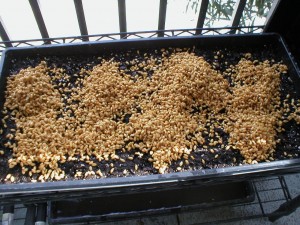
Add your pre-soaked wheatgrass seeds on to the top of your prepared organic soil in your growing tray. Wheatgrass grows best with warm days (65 to 75 degrees) , partly to mostly sunny with medium humidity and cool nights (55 to 65 degrees). Wheatgrass will grow good indoors with mild or passive sunlight.
Northerners; in the winter keep wheatgrass growing inside near a window for sun light.
Southerners; on very hot humid days start the growing of your wheatgrass inside and near a window for sunlight. On days of high humidity and heat you may place your wheatgrass outdoors for short periods of time (three to eight hours per day depending on the humidity level) to receive sunlight. High humidity may cause mold to grow at the base of your wheatgrass. If mold does appear rinse your wheatgrass thoroughly after harvesting or before juicing or consuming.
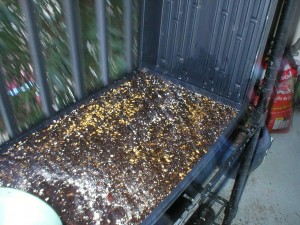
Gently smooth out the wehatgrass seeds evenly over flat growing soil.
STEP FIVE – Covering Your WheatGrass Seeds for Optimal Growth
Sprinkle a light coating of organic soil on top of freshly spread out wheatgrass seeds.
Lightly moisten the fresh coating of cover soil.
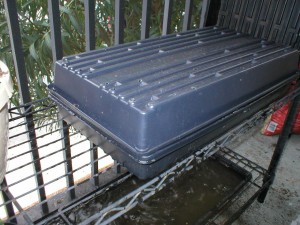
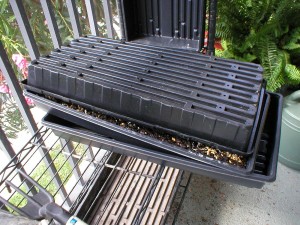
Cover seed growing tray with a vented or upside down draining growing tray or board to keep the seeds dark until seedlings sprout into light green new wheat grass. Please do not use newspaper as some recommend, newspaper contains ink and other chemicals which may leak in to the growing process.
At this point you may want to add a no drip (solid bottom) growing tray underneath the wheatgrass draining growing tray to catch over watering. Adding this bottom tray properly also adds a second watering system to the roots that almost always grow through the drain holes in the bottom of wheatgrass growing tray.
SPACE BETWEEN TRAYS; the hanging roots from the top tray will need to easily reach the water in the bottom tray. Therefore, I create a space of no more than one half inch height between top and bottom tray. The spacer between trays should always be as chemical free as possible (natural wood or glass).
If used out doors only; you may want to drill an overflow in this bottom no drip catch tray at about the one inch high mark to allow an overflow to avoid over-watering/soggy conditions.
If indoors you may want to leave the bottom tray with NO holes for added protection for your floors or counters from water damage (but be careful not to over water to avoid constant soggy soil conditions).
STEP SIX – Wheatgrass Watering
Day three of wheatgrass growth cycle.
Water when soil or seeds begin to become dry (remove top to check and then replace the top cover).
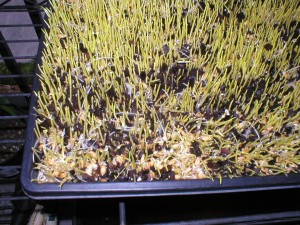
Morning of day four of wheatgrass growth cycle.
Remove top cover when all grass begins to appear.
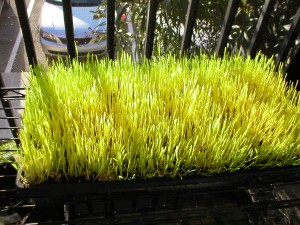
Evening of day five of wheatgrass growth cycle, yes it does grow this fast.
Water wheatgrass as it matures or feels dry. Most people can tell if the wheatgrass tray needs water by picking up the tray after watering to get a feel for the weight of a fully watered tray. When a tray drys out it becomes much lighter.
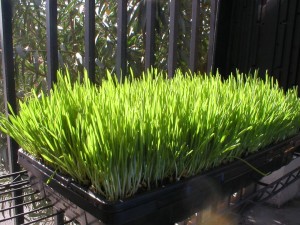
Day six of wheatgrass growing cycle pictured, notice how alive and green it now looks.
Water wheatgrass as it matures or feels dry.
STEP SEVEN – When to Harvest and Juice Wheatgrass?
Day seven of wheatgrass growing cycle pictured and time to take your first partial harvest for juicing.
Harvest wheatgrass by cutting just above the top of the soil. It is always best and optimal for nutritional and live enzymes effect to harvest and juice when wheatgrass has been freshly cut. If mold appears rinse your wheatgrass thoroughly before juicing.
STEP EIGHT – Harvesting and Storing Wheatgrass?
Day eight of the wheatgrass growing cycle pictured.
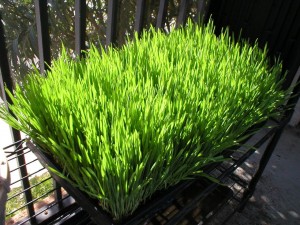
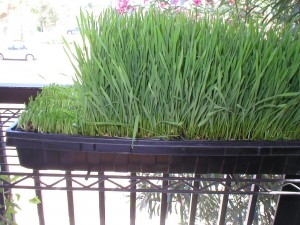
At some point in the growth cycle the wheatgrass is at an optimal nutritional juicing point. This point is just before or as the grass starts to split and begins it’s reproductive cycle. This is why I recommend to harvest all the wheatgrass at this point and juice what you need to immediately consume and store the rest in a container in the frig. Harvested or cut wheatgrass placed in a container will last about seven or eight days in a common refrigerator. Do not let harvested wheatgrass freeze and do not eat or juice wheatgrass if it has begun or has turned yellow.
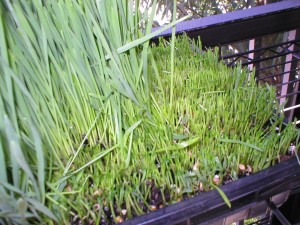
High humidity during the growth cycle may cause mold to grow at the base of your wheatgrass. If mold does appear rinse your wheatgrass thoroughly before juicing or consuming raw wheatgrass.
One Time Growing Cycle for Wheatgrass and Proper Disposal
Wheatgrass is great because the growing cycle is only between seven and fourteen days. The difference in the time growing cycle is due to watering, sunlight, humidity, temperature and soil differences.
Wheatgrass can be grown and harvested only once. Please discard your post harvest growing remains properly. Proper disposal may include compost or mulch it into your outdoor garden. Organic wheatgrass growing remains have a high natural organic make up and will add to the natural value of vegetable garden soil as well as many other types of gardens.

 Click On Above Ad to Go To Website

